很喜欢日奈的声音,所以用自己的电脑训练了 hina 的声音模型,并让她唱了一首歌
# python 虚拟环境搭建
这里我使用的 Python 版本为 Python3.9
安装 virtualenv
pip install virtualenv | |
pip install virtualenvwrapper # 这是对 virtualenv 的封装版本,一定要在 virtualenv 后安装 |
创建虚拟环境
这里我创建了名为 hina 的虚拟环境
PS E:\virtualenvs> virtualenv hina |
进入虚拟环境
命令行前面有 (hina) 说明我们已经进入了这个虚拟环境
PS E:\virtualenvs> cd .\hina\Scripts\ | |
PS E:\virtualenvs\hina\Scripts> .\activate | |
(hina) PS E:\virtualenvs\hina\Scripts> |
# pytorch 安装
首先进入 pytorch 官网
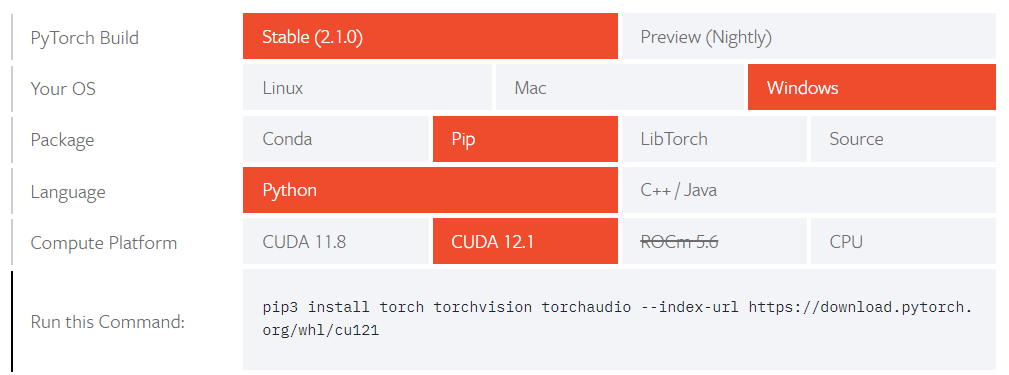
然后输入 nvidia-smi 命令查看 N 卡 (必须是 N 卡!A 卡是不行的) 支持的最大 CUDA 版本,我这里是 12.2

然后运行 Run this Command 中显示的命令
pip3 install torch torchvision torchaudio --index-url https://download.pytorch.org/whl/cu121 |
# so vits svc 5.0 环境搭建
下载源码
git clone https://github.com/PlayVoice/so-vits-svc-5.0.git --depth=1 |
安装项目依赖
pip install -r .\requirements.txt |
下载其他必要文件
因为有文件需要从 google drive 下载,所以记得挂好代理哦
首先下载 gdown 和 wget
pip install gdown, wget |
然后在项目文件夹内新建 download.py
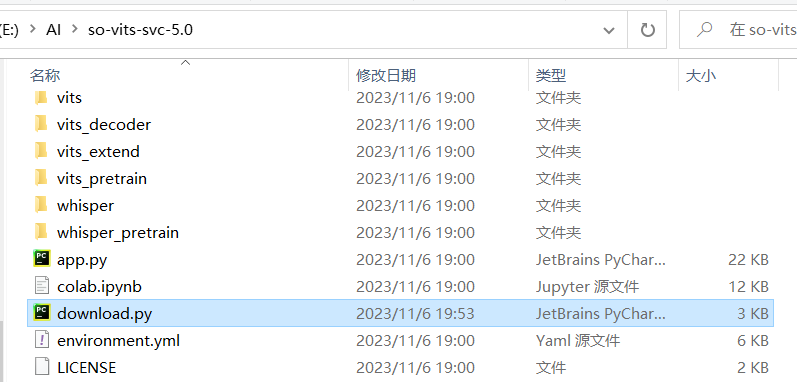
并将下面的代码 (我写的 XD) 复制到 download.py 中
import gdown | |
import wget | |
import os | |
File_DICT = { | |
# folder:https://drive.google.com/drive/folders/15oeBYf6Qn1edONkVLXe82MzdIi3O_9m3 | |
# we only need best_model.pth.tar according to README.md | |
"Speaker-Encoder": { | |
"name": "best_model.pth.tar", | |
"url": "1UPjQ2LVSIt3o-9QMKMJcdzT8aZRZCI-E", | |
"output_path": "speaker_pretrain/best_model.pth.tar", | |
"gdrive": True | |
}, | |
"whisper-large-v2": { | |
"name": "large-v2.pt", | |
"url": "https://openaipublic.azureedge.net/main/whisper/models/81f7c96c852ee8fc832187b0132e569d6c3065a3252ed18e56effd0b6a73e524/large-v2.pt", | |
"output_path": "whisper_pretrain/", | |
"gdrive": False | |
}, | |
"hubert_soft model": { | |
"name": "hubert-soft-0d54a1f4.pt", | |
"url": "https://github.com/bshall/hubert/releases/download/v0.1/hubert-soft-0d54a1f4.pt", | |
"output_path": "hubert_pretrain/", | |
"gdrive": False | |
}, | |
"crepe full": { | |
"name": "full.pth", | |
"url": "https://github.com/maxrmorrison/torchcrepe/raw/master/torchcrepe/assets/full.pth", | |
"output_path": "crepe/assets", | |
"gdrive": False | |
}, | |
"pretrain model": { | |
"name": "sovits5.0.pretrain.pth", | |
"url": "https://github.com/PlayVoice/so-vits-svc-5.0/releases/download/5.0/sovits5.0.pretrain.pth", | |
"output_path": "vits_pretrain/", | |
"gdrive": False | |
} | |
} | |
def main(): | |
REPO_PATH = (os.path.dirname(os.path.abspath(__file__))) | |
try: | |
for key, value in File_DICT.items(): | |
path = os.path.join(REPO_PATH, value["output_path"]) | |
print("Downloading {} to {}...".format(value["name"], path)) | |
if value["gdrive"]: | |
gdown.download(id=value["url"], output=path, quiet=False) | |
print("Done!") | |
else: | |
wget.download(value["url"], out=path) | |
print("\nDone!") | |
except Exception as e: | |
print("[!] Exception in download_binaries\n{}".format(e)) | |
if __name__ == "__main__": | |
main() |
随后在虚拟环境中运行 download.py 就可以啦
(hina) PS E:\AI\so-vits-svc-5.0> python .\download.py |
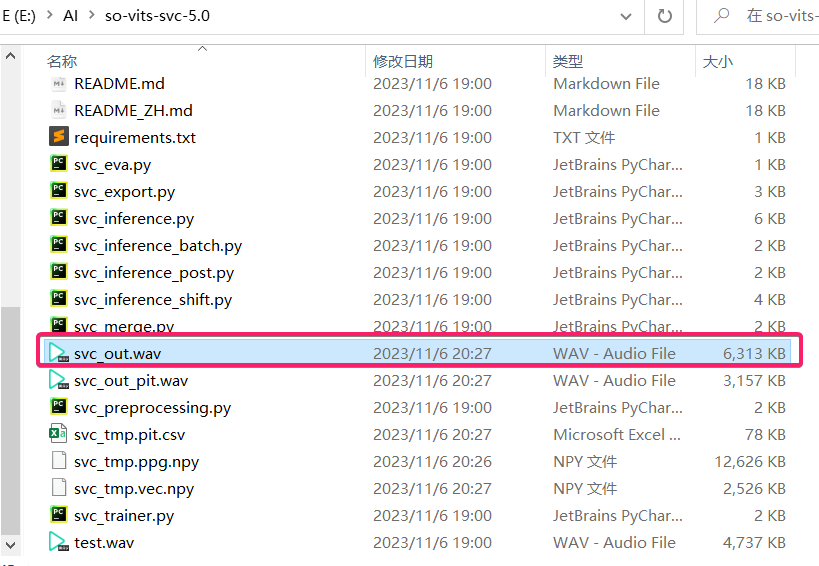
运行如下命令测试环境是否搭建成功
python svc_inference.py --config configs/base.yaml --model ./vits_pretrain/sovits5.0.pretrain.pth --spk ./configs/singers/singer0001.npy --wave test.wav |
在当前目录下出现 svc_out.wav 就说明可以正常使用啦
# 获取 hina 的声音
# 从 gamekee 中获取
在 gamekee 中,我们可以获取 hina 的音频,我们只需要写一个非常 easy 的 python 代码来把 hina 的声音下载下来
import requests | |
import re | |
import wget | |
import os | |
HINA = { | |
"hina_water":"https://ba.gamekee.com/83729.html",#日奈 - 水着 | |
"hina":"https://ba.gamekee.com/59934.html"#日奈 | |
} | |
for key,value in HINA.items(): | |
if not os.path.exists(key): | |
os.mkdir(key) | |
data = requests.get(value) | |
voices = re.findall(r'src="//(.*?\.(?:mp3|wav))"', data.text) | |
for v in voices: | |
wget.download("http://"+v,key) | |
print(f"download {v} success") |
# 从游戏资源中获取
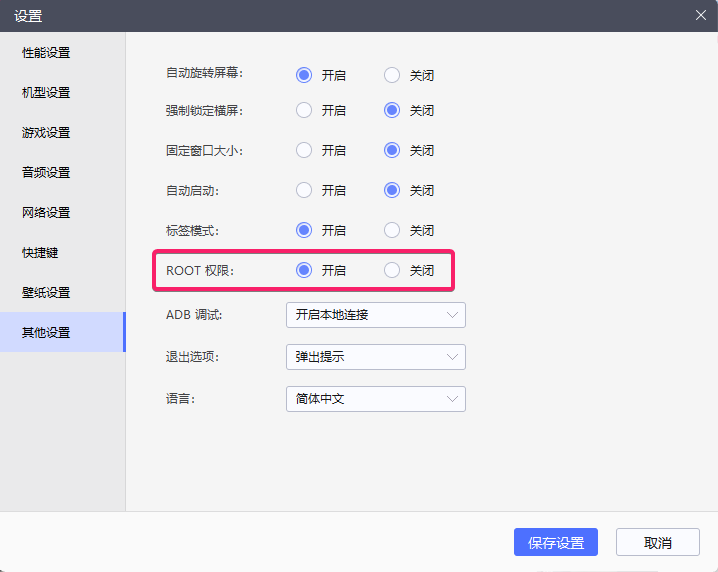
由于 hina 是蔚蓝档案中的角色,所以我们需要将 hina 的音频资源从游戏文件中提取出来,首先要做的就是在模拟器从谷歌商店中下载蔚蓝档案,这里我使用的模拟器是雷电模拟器
然后在 设置->其他设置 中开启 ROOT权限
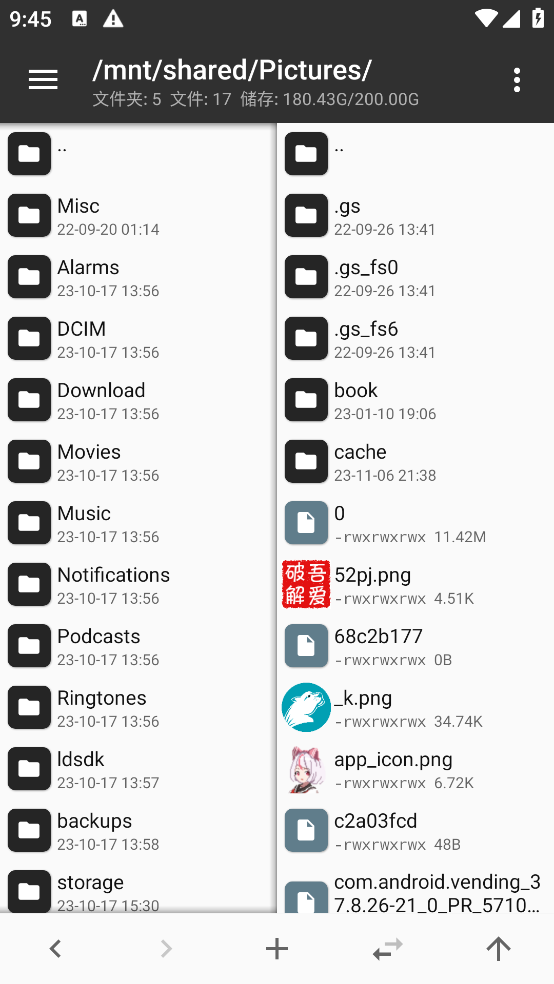
然后我们在侧边栏找到 更多->共享文件->打开安卓文件夹 ,找到安卓共享文件夹文件名为 /mnt/shared/Pictures

随后安装 MT 管理器并打开,在右侧边栏进入 mnt/shared/Pictures
在左侧边栏进入 /storage/emulated/0/Android/data , 找到文件夹名称为 com.nexon.bluearchive , 这个文件夹是蔚蓝档案全部音频图片资源文件的所在位置,长按该文件夹,并选择 复制->

等到复制完成之后,在侧边栏点击 更多->共享文件->打开电脑文件夹 即可找到保存到电脑上的蔚蓝档案资源文件~
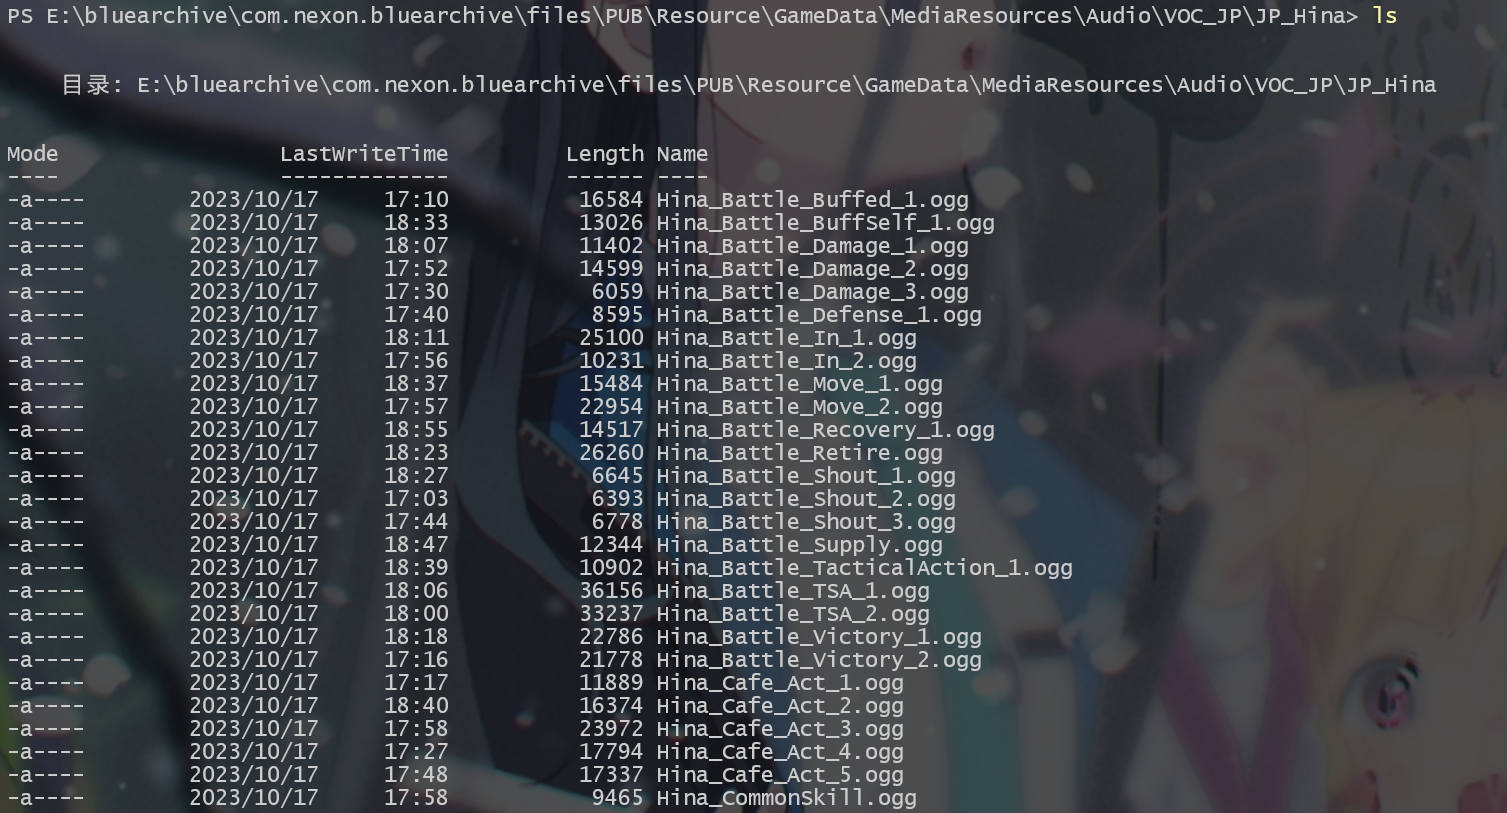
随后我们进入到 com.nexon.bluearchive\files\PUB\Resource\GameData\MediaResources\Audio\VOC_JP\JP_Hina , 这里就是 hina 的全部音频啦
由于获取到的是 ogg 格式的文件,所以我们需要使用格式工厂把 ogg 文件全部转换成 wav 文件
然后在新建一个 so-vits-svc-5.0\dataset_raw\JP_Hina 文件夹,并将我们转换完成的 hina 的音频复制到这个文件夹中
# 数据预处理
python svc_preprocessing.py -t 2 |
-t:指定线程数,必须是正整数且不得超过 CPU 总核心数,一般写 2 就可以了
进阶命令
- 重采样
生成采样率 16000Hz 音频,存储路径为:./data_svc/waves-16k
python prepare/preprocess_a.py -w ./dataset_raw -o ./data_svc/waves-16k -s 16000
生成采样率 32000Hz 音频,存储路径为:./data_svc/waves-32k
python prepare/preprocess_a.py -w ./dataset_raw -o ./data_svc/waves-32k -s 32000
- 使用 16K 音频,提取音高
python prepare/preprocess_crepe.py -w data_svc/waves-16k/ -p data_svc/pitch
- 使用 16k 音频,提取内容编码
python prepare/preprocess_ppg.py -w data_svc/waves-16k/ -p data_svc/whisper
- 使用 16k 音频,提取内容编码
python prepare/preprocess_hubert.py -w data_svc/waves-16k/ -v data_svc/hubert
- 使用 16k 音频,提取音色编码
python prepare/preprocess_speaker.py data_svc/waves-16k/ data_svc/speaker
- 提取音色编码均值;用于推理,也可作为发音人统一音色用于生成训练索引(数据音色变化不大的情况下)
python prepare/preprocess_speaker_ave.py data_svc/speaker/ data_svc/singer
- 使用 32k 音频,提取线性谱
python prepare/preprocess_spec.py -w data_svc/waves-32k/ -s data_svc/specs
- 使用 32k 音频,生成训练索引
python prepare/preprocess_train.py
- 训练文件调试
python prepare/preprocess_zzz.py
# 训练
-
参数调整
如果基于预训练模型微调,需要下载预训练模型 sovits5.0.pretrain.pth 并且放在项目根目录下面
并且修改configs/base.yaml的参数pretrain: "./vits_pretrain/sovits5.0.pretrain.pth",并适当调小学习率(建议从 5e-5 开始尝试)
learning_rate & batch_size & accum_step 为三个紧密相关的参数,需要仔细调节
batch_size 乘以 accum_step 通常等于 16 或 32,对于低显存 GPU,可以尝试 batch_size = 4,accum_step = 4 -
开始训练
python svc_trainer.py -c configs/base.yaml -n sovits5.0 -
恢复训练
python svc_trainer.py -c configs/base.yaml -n sovits5.0 -p chkpt/sovits5.0/sovits5.0_0***.pt -
训练日志可视化
tensorboard --logdir logs/
# 人声伴奏分离
想让 hina 唱出单相思,那么有伴奏是肯定不行滴,我们需要将人声和伴奏分离
# UVR5
这里需要使用到的工具是 Ultimate Vocal Remover 5 (UVR5), 并下载对应的处理模型。
可以前往这个网站查看模型的得分
一些推荐的处理模型和功能如下:
Demucs | MDX23C: 分离人声及伴奏VR Architecture - 5_HP-Karaoke-UVR: 分离和声VR Architecture - UVR-DeEcho-DeReverb: 去除混响和回声
可以先使用 Demucs | MDX23C 来分离人声及伴奏,如果听到人声有和声的话,可以用 VR Architecture - 5_HP-Karaoke-UVR 来二次处理
当然,为了方便也可以直接去 b 站找到别人分离好的人声用啦~
# 推理
-
导出推理模型:文本编码器,Flow 网络,Decoder 网络;判别器和后验编码器等只在训练中使用
python svc_export.py --config configs/base.yaml --checkpoint_path chkpt/sovits5.0/sovits5.0_0***.pt -
推理
-
如果不想手动调整 f0,只需要最终的推理结果,运行下面的命令即可
python svc_inference.py --config configs/base.yaml --model sovits5.0.pth --spk ./data_svc/singer/修改成对应的名称.npy --wave test.wav --shift 0 -
如果需要手动调整 f0,依据下面的流程操作
-
使用 whisper 提取内容编码,生成 test.ppg.npy
python whisper/inference.py -w test.wav -p test.ppg.npy -
使用 hubert 提取内容编码,生成 test.vec.npy
python hubert/inference.py -w test.wav -v test.vec.npy -
提取 csv 文本格式 F0 参数,用 Excel 打开 csv 文件,对照 Audition 或者 SonicVisualiser 手动修改错误的 F0
python pitch/inference.py -w test.wav -p test.csv -
最终推理
python svc_inference.py --config configs/base.yaml --model sovits5.0.pth --spk ./data_svc/singer/修改成对应的名称.npy --wave test.wav --ppg test.ppg.npy --vec test.vec.npy --pit test.csv --shift 0
-
-
一些注意点
当指定–ppg 后,多次推理同一个音频时,可以避免重复提取音频内容编码;没有指定,也会自动提取当指定–vec 后,多次推理同一个音频时,可以避免重复提取音频内容编码;没有指定,也会自动提取
当指定–pit 后,可以加载手工调教的 F0 参数;没有指定,也会自动提取
生成文件在当前目录 svc_out.wav
args –config –model –spk –wave –ppg –vec –pit –shift name 配置文件 模型文件 音色文件 音频文件 ppg 内容 hubert 内容 音高内容 升降调 -
去噪后处理
python svc_inference_post.py --ref test.wav --svc svc_out.wav --out svc_out_post.wav